ARCH 681 Final Review 12/21/09
Newport Seamen's Institute
Layout requirements: Hand drawn, 4 sheets at 30"x40"
Construction model of multi-purpose room along with pg 2-construction drawings and diagrams of the space.
Welcome to my journey
Here is a compilation of my experiences, most recently starting a Master of Architecture program at the University of Oregon. As the process unfolds, new doors and light reveals the things previously hidden. A process of learning, living, being.
Thursday, December 03, 2009
Monday, November 09, 2009
Facade Study
3 floors, 5 bays of equal proportion, 3 layers beyond the glass plane but no more than 1/2" from mounting board.
A fun exercise in facade composition that often does not get explored until the very end of the schematic design phase. This project was for spatial composition so does not directly relate to my current studio project, but I tried to incorporate the window light tables that I want to explore in studio as well.
Friday, November 06, 2009
Mid Term
Mid Term Review November 4, 2009.
Street facade (south) with adjoining properties
Site plan with roof plan, left is level 3
section through the central circulation
model photos in group site model for context, central circulation and view from the pier.
Goals:
My goals for this studio have been to create a very cohesive site plan with central axis that combine the indoor and outdoor spaces. This centralized structure will allow for relationships to develop within the disparate program functions.
The second goal was how to daylight all of the spaces, and preferably from two sides. This will e accomplished through transverse circulation cooridors being lit from above with skylights/sawtooth ridges, and develop light shelves on the east and south sides to project light deeper into the large spaces.
Thoughts:
Felt like a final pin up, but one I wasn't fully resolved with all of my choices, so it's nice to have 3 more weeks to fine tune things. The areas I have not spent much energy include the mediation space and courtyard and the roof planes. How to unify while keeping the separate functions visible will be the next challenge. Also how to draw the entire facade together with some horizontal lines, window light shelves?
Thursday, October 29, 2009
Week 5 Studio
Diagrams of site influences and building organization
Site Plan showing the second floor topography, adjacent buildings
Section through the main circulation B in floor plan
So here are some working photos of my project thus far. Mid terms are November 4th, so I will have some more drawings for that presentation and gather feedback to work and refine the design further. It has been an interesting process to develop our own working style to produce the cohesion and flow within the diverse program elements.
I started modeling with blocks for massing, each block height is approximately 10' at 1/16" =1' scale. the cardboard on the left is the existing fish restaurant abutting our site.
Monday, October 19, 2009
Path Prospect Refuge
Problem: To design a prospect and refuge space on a sloping site with net zero fill removal.
Solution: Above, stairway to prospect cantilever, with prospect dug into the hillside behind accessed by two slit doorways.
Thoughts: I enjoyed the abstract qualities of this assignment, but was also able to consider human occupation of this site. The roof cantilever and supports are a bit disjointed from the overall design, as well as the transition from stairs to platform.
Fall 2009 Studio
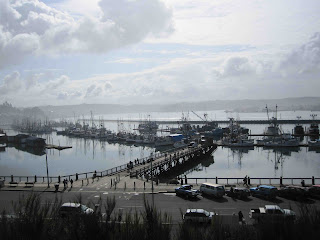
The fall quarter is in full swing. Our studio project this term is a Commercial Fisherman's Association Facility in Newport, OR. We visited the site (above) in the first week and took many observational data and mapped the land. The facility will house many functions, such as a chapel, multi purpose room, pub, computer room, hostel, kitchen, retail, etc. It has an "urban" context and located on the historic Bay Blvd of Newport.
Now it's figuring out the form, function and internal placement of the many uses.
Monday, September 07, 2009
Cooking with the Sun
Sun Oven International
The sunny Eugene weather is ideal for cooking with my sun oven. I got this Sun Oven International from Alternative Power Ent. when I worked there. We'll see how many days the rest of the year will be good for sun cooking in Eugene! I've made rice, beans, soups, curry dishes, stir fried veggies, bread, brownies, apple crisp. . . .anything is possible! Noel made my custom casserole dish to maximize the interior volume, the dark glaze helps retain the heat, and can make enough soup for many meals. I've also been playing with what to cook while I'm at the studio all day. In the morning I put all the soup ingredients in the casserole dish, set up the sun oven to face south, then let is slow cook throughout the day. This has worked really well, but need to add a bit more water to rice so it doesn't dry out. But things will never burn because the moisture is retained within the sealed cooking box.
When the sun goes down, or doesn't even appear we can the cook more with our wood fired cob oven in the back yard. Here Noel is cooking a pizza, takes about 30 seconds- 1 minute depending on how hot the fire is in the back.
Build your own! lots of resources available for Cob Ovens or also known as Earthen Ovens
Eugene House
1960 Grant St.
Here is some information on the sweet rental house I live in! It's a renovated ranch style house 2.5 miles from the U of O campus. It's nice to have a longer bike commute since often it's the only time to be outside on those busy studio days!
New parts of the house:
Skylights in the kitchen and studio space
American Clay Plaster walls and ceilings
Lime Plaster bathroom with cob partitions
Wood burning stove for heat
Big back porch half covered, half not
Materials from BRING Recycling Center, even an old gym floor as the new flooring of the house
Earthen floor in the kitchen, very durable, but also soft to sand on compared to concrete. One of my aunts vases blew off the window sill and didn't break on the floor.
Wood fired outdoor cob oven
Gardens raspberries, tomatoes, peas,
Fruit trees including apple, pear, peach, a fig and 2 kiwis!
Wednesday, August 12, 2009
Album Cover
So close to the end of summer term!! This is our final media project, to create an album cover for our house project. My emphasis was on the foundation rock walls that extend into garden walls, the building planes, and then the roof planes extending and becoming the landforms.
I felt like I was back in 2nd grade holding up my project to show everyone. but oh so refreshing to be creating art!
Monday, August 10, 2009
Final Review ARCH 680
Final Pin up format
Process-created an outline of what elements i wanted to include, the space they would occupy and then how to place them to create a complete shape. Then created a timeline of what drawings I wanted to get done each day.
Media- Velum cut for my sizes, so was able to trace my other drawings, black pen was used to highlight the important aspect of each drawing then rendering in pencil. Mounted on butcher paper, overlapping and creating a double layer down the center where the larger 22" wide drawings fit. pins were small sewing pins with small silver heads that I had at home. Printed all my text and then hand traced it onto the images.
Context and Program
Site Plan Material study
Structural diagram, floor planes, post beams and joists
Sun, Wind, Water, and Energy production
First Floor Plan Second Floor Plan
Section B
Perspectives
Section A, main house looking south
Final Model:
My Model! all material was found in the scrap pile, including the trees.
Thoughts-My self imposed timeline was great, although it caused some anxious feelings on Saturday afternoon, but then realized that was what most people would be feeling on Sunday afternoon, so I was able to use my Sunday (that was originally allotted as free time) to finish and put it all together.
I stuck with just pencil rendering because I wanted to see how I could bring my drawing skills into the controlled environment of architectural drawings, how to make them bold, focus on the ideas I wanted to portray, and maintain a relationship to each other. I did not include color as a conscious decision of not feeling comfortable with how to bring in the color really subtly. Next time I will play around the color more!! But I did appreciate the elegance that resulted in the final presentation. I will also learn photoshop/indesign to work with the layout and how to print my hand drawings so they continue to keep the feeling of the hand.
Great feedback from the reviewers, I truly love the review process for what it reveals in our presentation, and what it shows as able to get across versus what stops people from understanding the underlying concepts. The main things I need to incorporate next time is how to have minimal text and create DIAGRAMS that represent the underlying design ideas. Example: the strong foundation and the axis within the site and buildings. Primary Ideas-represent those, the secondary ideas aren't as necessary. The structural diagrams started to get at that, but did not incorporate the way the outdoor spaces are additions to the interior the way it is revealed in my first floor plan. One reviewer asked what my three main concepts were for the project. I had a hard time coming up with those without having previously thought what they were. They are there, just hadn't been fully laid open as the main reasons for my decsions during the process.
I found a rock in the Willamette river that is a pyramid shape (photo to follow) and will have that on my studio desk as a continual reminder to find the three main concepts, push them, alter them, but continually be reminding myself of them.
Subscribe to:
Posts (Atom)